Your information saved successfully.
Assignments Statuses
Visualize how your customers are being served
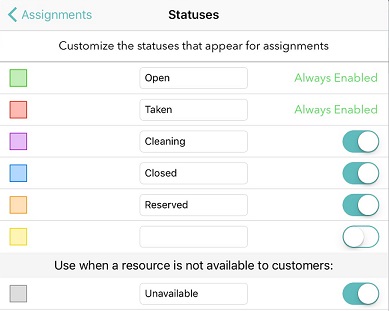
Custom status colors let you quickly code situations that apply to your business. You could choose purple for a table that needs to be cleaned, yellow for a bowling lane that is reserved, blue for a section that is closed, etc.
Choose what you want the colors to represent in the app under the gear icon > Manage Assignments > Statuses. Add your own wording to tailor the statuses to fit your business needs.

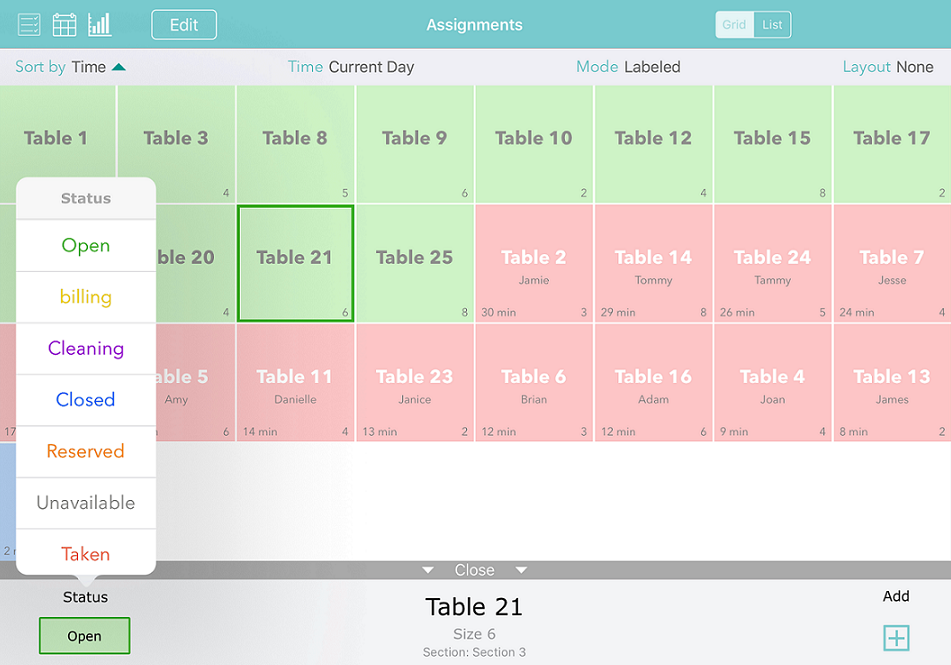
Once you’ve set up your statuses, using them is easy. From the main waitlist screen in the app, tap the circle with the line to get to the Assignments screen. On the Assignments screen, tap the resource and choose the status from the action bar at the bottom.

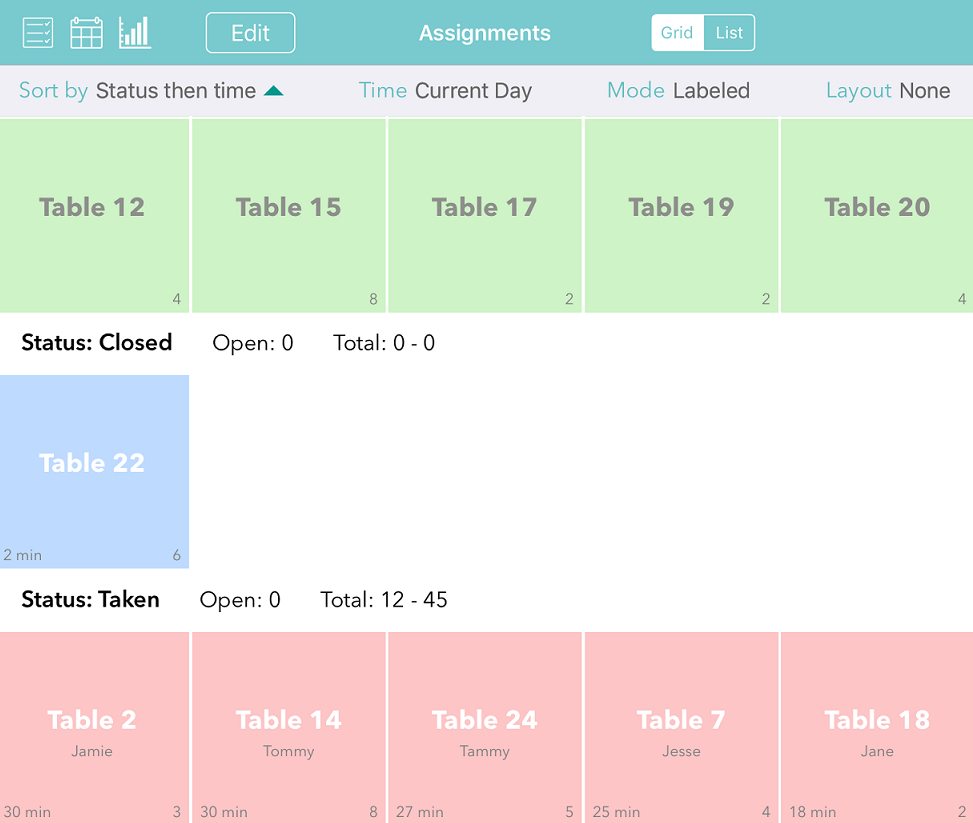
A timer will show how long the resource has been in its current status (except for Open and Unavailable). You can sort your Assignments screen by Status:

Statuses will automatically revert back to Open after 6 hours, to make it easy to start fresh at the beginning of the next day. If you’d like to block out a resource as taken for a longer time, you can use the “Unavailable” status, which will stay until you change it. See more about getting the most out of the Resources features here.
Grid View is pictured here; assignments and their statuses can also be seen in List View in a vertical orientation (available on all devices). The full floorplan, available with the Platinum subscription, also uses these assignment statuses and can be accessed in the app on a cell phone or tablet.

Once you’ve set up your statuses, using them is easy. From the main waitlist screen in the app, tap the circle with the line to get to the Assignments screen. On the Assignments screen, tap the resource and choose the status from the action bar at the bottom.

A timer will show how long the resource has been in its current status (except for Open and Unavailable). You can sort your Assignments screen by Status:

Statuses will automatically revert back to Open after 6 hours, to make it easy to start fresh at the beginning of the next day. If you’d like to block out a resource as taken for a longer time, you can use the “Unavailable” status, which will stay until you change it. See more about getting the most out of the Resources features here.
Grid View is pictured here; assignments and their statuses can also be seen in List View in a vertical orientation (available on all devices). The full floorplan, available with the Platinum subscription, also uses these assignment statuses and can be accessed in the app on a cell phone or tablet.
