Your information saved successfully.
Kiosk Main View
Customize the main messaging, actions, and wait estimates
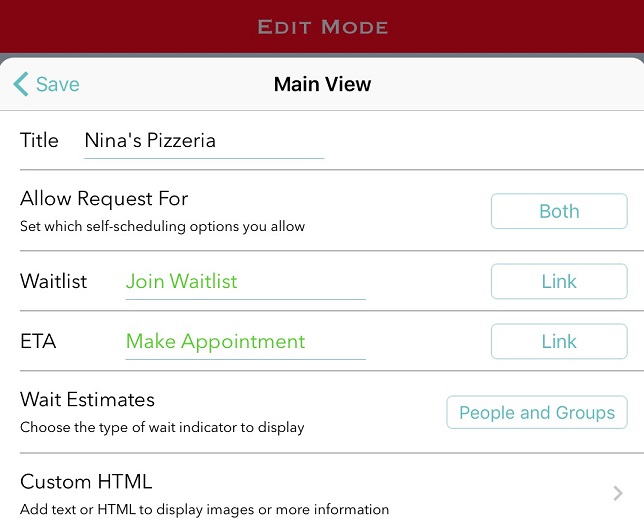
In the settings, the Main View area has options to customize the text, main actions, wait estimate display, and HTML of the initial kiosk view that customers see when checking themselves in.

From this page you can do several things:

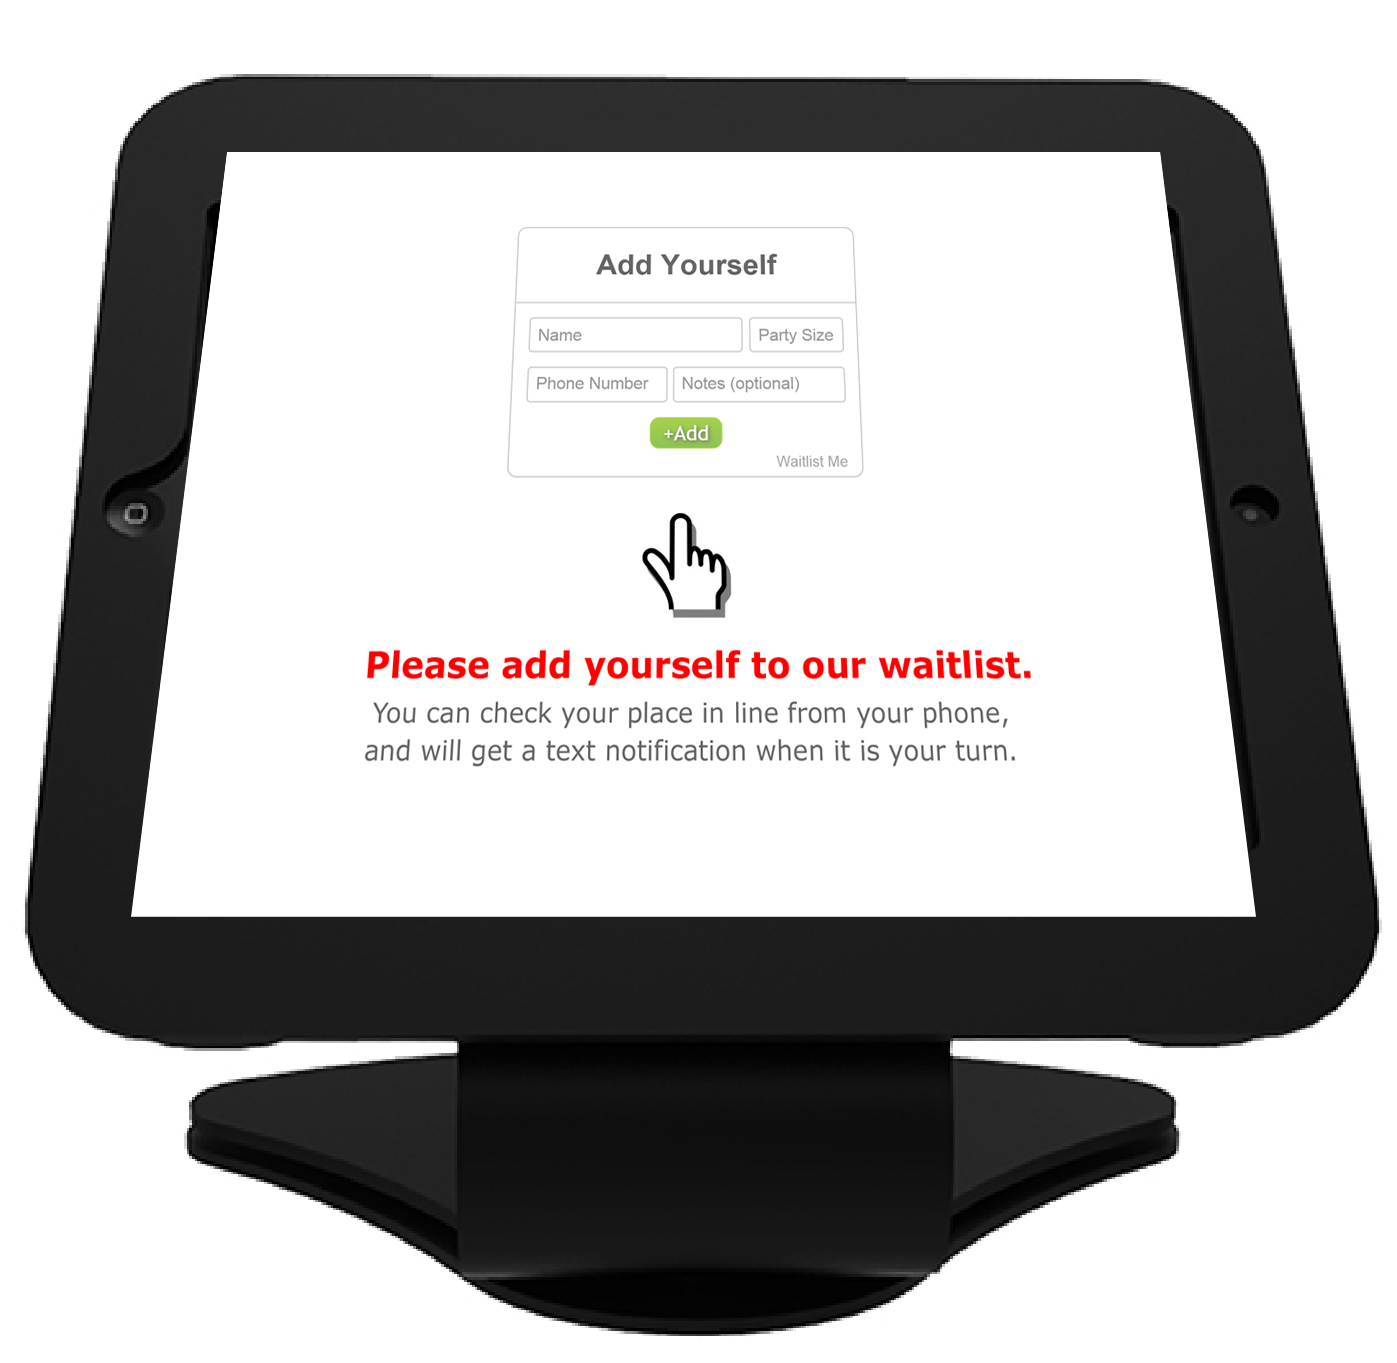
If you need to add instructions for your clients, the Custom HTML field will allow you to add text or any HTML you would like. There are also some samples to get you started. Here is an example of the main view with an image to offer additional instructions:

When you’re done, press Exit on the upper right to return to the kiosk.
Edit mode
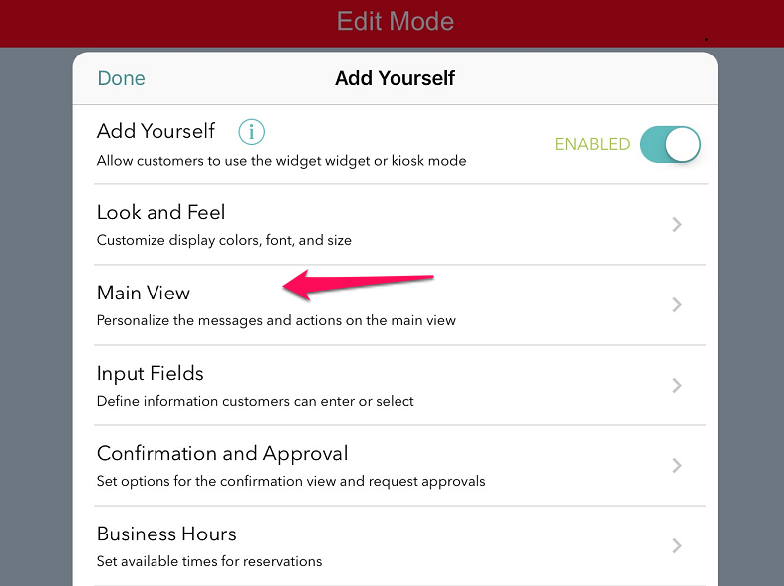
As a reminder on where to edit these settings, first, turn on Kiosk Mode by pressing the gear icon > Add Yourself > select On for Kiosk Mode. Once you’ve entered the kiosk, select the menu on the upper right and choose Edit Settings. Enter your password to get into the Edit Mode.
You’ll now see a red bar across the top that lets you know you’re in Edit Mode, and the gear icon on the left will take you into a menu where you can choose the Main View.
Back to self check-in kiosk main page.

From this page you can do several things:
- Edit the title text to display at the top of the box
- Select whether you want to accept requests for the waitlist, reservations/appointments, or both.
- Customize the names of the main actions and whether they show as buttons or links.
- Decide how you want the wait estimates to display (number of people, the full waitlist, last estimated time, etc). Or simplify the process by not showing any wait estimates and allowing customers to go straight to entering their information. (See more here).
- Add any text or HTML you want (daily specials or loyalty program information, for example). Please note, this option is only available with a Pro or Platinum subscription.

If you need to add instructions for your clients, the Custom HTML field will allow you to add text or any HTML you would like. There are also some samples to get you started. Here is an example of the main view with an image to offer additional instructions:

When you’re done, press Exit on the upper right to return to the kiosk.
Edit mode
As a reminder on where to edit these settings, first, turn on Kiosk Mode by pressing the gear icon > Add Yourself > select On for Kiosk Mode. Once you’ve entered the kiosk, select the menu on the upper right and choose Edit Settings. Enter your password to get into the Edit Mode.
You’ll now see a red bar across the top that lets you know you’re in Edit Mode, and the gear icon on the left will take you into a menu where you can choose the Main View.
Back to self check-in kiosk main page.
