Your information saved successfully.
Online Reservations
Allow customers to make reservations directly on your website
Searching for an easier way to schedule customers? Waitlist Me includes a feature to reserve from your website, and it’s as simple as placing a link or line of code.
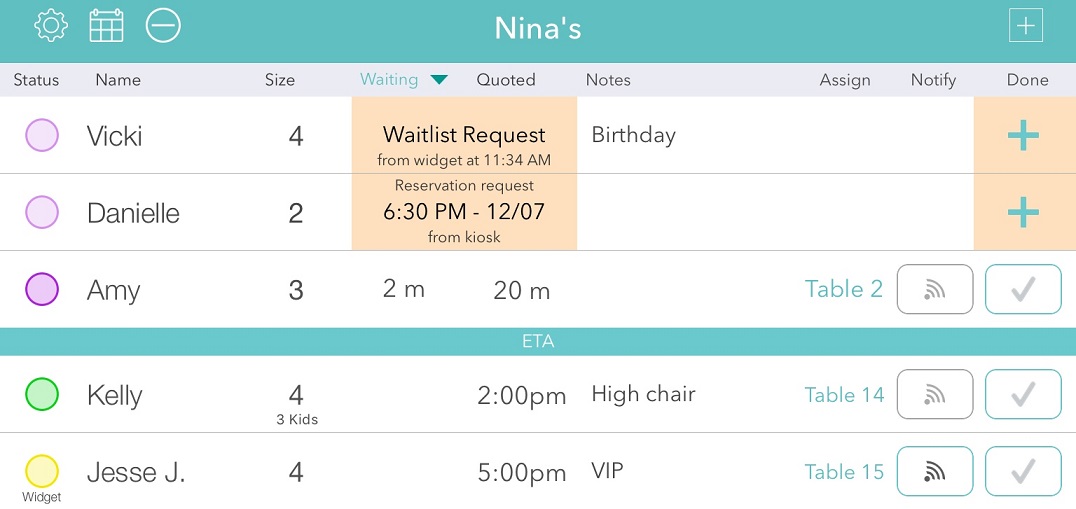
Customers can make requests, and these will appear in the waitlist for quick approvals. You’ll receive a notification in the app so you know when a request needs your attention. Requests will show above the waitlist, as well as on the daily reservation views.

When you approve a request the customer gets a confirmation text with their date and time, and the new entry appears on the reservation page. If a request is declined within 30 minutes, the customer receives a text notifying them that their request could not be accommodated.
To enable the feature, log into Waitlist Me and head to Account > Settings > Add Yourself, then flip the switch to On. Next, you can customize settings such as the fields available to customers to enter their information; whether you’d like to skip the approval step; what details you need from customers.
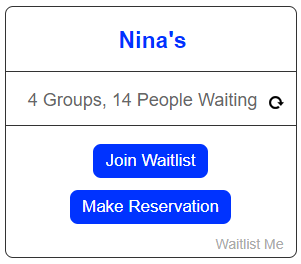
You can either link to the hosted Web Widget page or embed the Widget on your website. Select options to fit your brand, copy the code and place the Add Yourself Web Widget on a website. The link to the hosted page is perfect for social media.

There are a few display options you'll want to set up when using reservations. See this page to walk through those settings. If you want more step-by-step details for setting up your widget, visit this page. To set up email confirmations, please visit this page. Also, Pro and Platinum subscribers have additional options for setting limits on reservation times blackout dates.
Customers can make requests, and these will appear in the waitlist for quick approvals. You’ll receive a notification in the app so you know when a request needs your attention. Requests will show above the waitlist, as well as on the daily reservation views.

When you approve a request the customer gets a confirmation text with their date and time, and the new entry appears on the reservation page. If a request is declined within 30 minutes, the customer receives a text notifying them that their request could not be accommodated.
To enable the feature, log into Waitlist Me and head to Account > Settings > Add Yourself, then flip the switch to On. Next, you can customize settings such as the fields available to customers to enter their information; whether you’d like to skip the approval step; what details you need from customers.
You can either link to the hosted Web Widget page or embed the Widget on your website. Select options to fit your brand, copy the code and place the Add Yourself Web Widget on a website. The link to the hosted page is perfect for social media.

There are a few display options you'll want to set up when using reservations. See this page to walk through those settings. If you want more step-by-step details for setting up your widget, visit this page. To set up email confirmations, please visit this page. Also, Pro and Platinum subscribers have additional options for setting limits on reservation times blackout dates.
